
Having a personalized signature in your email is an “etiquette” in the business world. It conveys a professional image and facilitates the communications. Many companies mandate their employees to create email signature adhering to certain company standards. The signature usually includes certain items such as name, title, company name, company address, phone #, fax #, email address, web address, and company logos.
Creating a signature in Microsoft Outlook is easy. Please follow the below steps to create one.

Step 1: When you are in Microsoft Outlook, click “Home” on the ribbon and then click “New E-mail” to create a new email.

Step 2: In the email, click the “Insert” tab on the ribbon, select “Signature” and then “Signatures…”

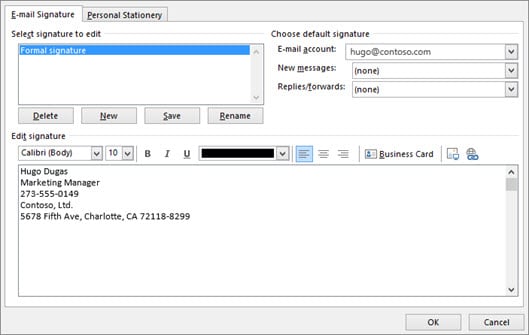
Step 3: Under the “E-mail Signature” tab, click “New” to add a new signature.
Step 4: Under “Choose default signature”, in the “E-mail account list”, click an email account to associate with the signature.
Step 5: In the “New messages” list, select the signature that you want to include.
Step 6: If you want a signature to be included when you reply to or forward messages, in the “Replies/forwards” list, select the signature. Otherwise, click (none).